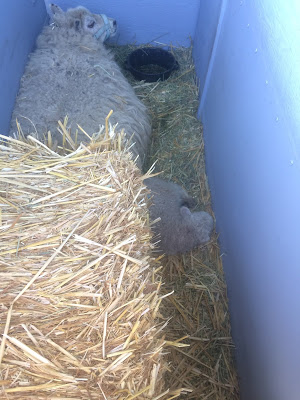
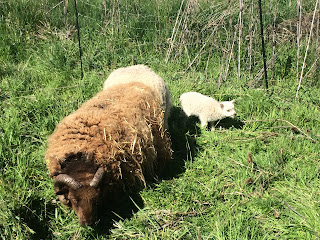
Thursday, December 15, 2016

Podcasts, Patreon, and Recipes, Oh My!

We have been freezing here on the ol' homestead. Literally.  We may have slightly underestimated how cold it would get in our new home, and how the RV would do.  So we have been distracting ourselves with other things.


First and foremost, with our podcast!  We have been enjoying this so much!  This week we reminisce the foods of summer, in particular, tomatoes!  Who knew we would have so much to say about tomatoes! You can find the podcast on your fav podcast listening thing-y-mo-bobber (like iTunes, Stitcher, etc) or you can click on the image to go listen directly. And please make sure to hit the like button and if you can, rate and review!  It helps us get seen by other folks!


And speaking of, we have created a Patreon account!  If you are not familiar with Patreon, it is an awesome site that helps people support artists, including podcasters like us! For as little as $1/mth, subscribers/supporters can get exclusive content!  Check it out here!

In our podcast, we talked about a few recipes that we created this week out of necessity.  One was Ric's special winter warm up drink (with rum), which you can find here on our FB page.  Make sure to follow us there for other fun stuffs, too!

We also talked about how we sort of ran out of propane and had to make due with the microwave.  I created my own "Mexican style omelettes in a bowl" and they turned out awesome! We had to share this recipe.  If you don't feel like dirtying extra dishes, or you are living a simple lifestyle or just feel like a quick meal, here you go!

Fiberton Acres Microwave Mexican Style Omelette in a Bowl


Ingredients:

  • 3 eggs
  • Splash of milk (dairy or non)
  • 1 hot pepper, diced
  • 1 tomato (yay!) or 1/4 cup of canned diced tomatoes without the liquid
  • 1/4 tsp cumin
  • 1/4 tsp garlic powder (or if you have Adobo seasoning, use that!)
  • 1/4 tsp oregano
  • Some Parmesan cheese (or even better is cotija!)
  • Cilantro to garnish
How to make this lovely dish:
  1. Crack eggs into microwave safe bowl
  2. Beat eggs and add splash of milk and spices and whisk well.  If you are at work or something, use a fork to whip that up.
  3. Add tomato, pepper and a small handful of cheese and mix well.
  4. Put in the microwave on high for 3-4 mins (start with 3 and check center to see if eggs have set.  My microwave I have to do 4 mins.)
  5. Chop up a little cilantro to throw on top, toss on a little more cheese and enjoy! Add salsa if you like, too!
Last, but not least, we referenced the Ball Blue Book Canning guide!  Here is a few shots of our 1983 guide and the things we referenced...


That's it folks!  

-Ash and Ric and the Fiberton gang

Thursday, November 17, 2016

Introducing our new podcast!


We are super excited to present our new podcast! Fiberton Acres' podcast is a Humorous History of Horticulture and Husbandry. A fun introduction to what we do, but more than that, it looks at the history of animal rearing and husbandry, agriculture, and some of the fun and funny things that we did, and some of the adventures that we have encountered in our forays into our relatively new farm life. We are also excited to take time with others in the field, other small farmers and ranchers, to see what they do and why they do it.

This episode is looking at a broad history of sheep and the uses of the domesticated sheep.

We found most of our details from:
We also want to say thank you to Charlotte Cleary for helping us with our research, and to Lefty5Strings for our intro and outro music!

Make sure to subscribe on whichever podcast player you use, and we will post each episode here! Right now you can find us on Soundcloud, iTunes, Stitcher, TuneIn!

Thank you to everyone for your support! Head over to our Facebook page to leave your comments! (Or hit us up at Instagram or twitter @fibertonacres!)


- Ash and the Fiberton gang

Wednesday, November 2, 2016

We've moved!

I know, I know....we have not blogged in waaaay too long.  But good news!  We have moved!  Not only are we are now in our new home/location in Eastern Ohio, and we are integrating our blog with our new website!  So, if you were reading/following us here, we will soon be moving all our content over to our new blog here.  
We are also working on some exciting new posts, new content, and of course, new products!  Stay tuned!
- Ashley and the Fiberton gang

Monday, July 11, 2016

Settling into our new place in OR before we leave for WV

Once set up at our new spot in Eugene, we headed to the farm store to get supplies to make our temporary space feel more like home for our 3 months of Oregon living.

We discovered the poly-wire electric fence, a small white polyester cording with metal strands running through it. We were able to run the fence using 4 T-posts and about 10 plastic fence line holders (only $2.99 each).

Little Pauly nursing.  No wonder she is growing so quick!
(Portable electric fencing in background.)

We let the sheep out in to their new pasture and watched them go crazy eating all the new grass. (Which here in Eugene there is no lack of grass and other greens to eat for the sheep.) However, they began escaping almost immediately, and Rocky was the first walking around the yard.


“Rocky! Go home.” We yelled at him (he’s not a good listener) as we walked toward him he ran back under a high spot in the fence. So we turned off the fence, lowered the high spot, turned the fence back on, and went back inside to keep setting the place up.

Good job herding Rocky back, JB. 

“BBllllaaaaaattttt.” we heard from outside and we saw Pauly walking around outside the fence and eating weeds right outside the door. We walked toward Pauly and she snuck under a different spot in the fence. This would go on the rest of the day as the sheep pointed out all the weak spots in the fence for us.

Look at that cute lil face!

After a nice day of running fence and setting up rabbit hutches, we packed it in at around 8PM and slept for about 13 hours.

The next couple of months would prove to be a similar experience to our first day. Days seem to consist of at least one animal escaping (cats bolting out of the RV, dog figuring out how to escape his first lead setup, Pauly in the driveway yelling at 4am, etc.) To be fair, the rabbits did not escape once.

However, during our first month, we experienced our first loss of an adult animal. One of the younger rabbits, little Edward, fell ill with mucoid enteritis. It is a tough disease for rabbits to recover from, and the antibiotics that you give can often be as tough on the body as the disease. After trying what we could, we decided it was time to try the antibiotics. We knew that they can wreak havoc on the intestinal system, so we gave her yogurt and enzymes to try and offset the antibiotics. Unfortunately, either the antibiotics or the illness got the better of her, and we had to say goodbye.

Edward and I in the Cali sun before the move. 

It is crazy to think that we have already spent almost 4 months here in Eugene.  We have been working, taking care of our crazy critters, and preparing for the big move in the beginning of August to our new home on the border of Ohio and WV!

More on that move soon...

-Ric and Ash

Thursday, June 9, 2016

Final day on the road to Oregon

We rolled into Weed, CA around 8:00 at night and proceeded to Friendly RV Park for the night.
A man met us out front and explained that they only take cash or check. We, being good 21st century folks, had neither. I had to drive the Kia over to the Pilot gas station hit up the ATM for $30 (that the ATM charged $2 and my bank charged another $3). We paid the guy and prepared for the night. The heater in the RV kicks out a lot of heat but is also roughly as loud as a small jet aircraft at takeoff so we couldn’t use it, luckily we had about 1 million blankets to keep us warm.

In the morning, as we were doing the feedings, the couple from the camper next to us came over to say hello. They were an older couple and had both grown up on farms up in Canada. After talking to them for a while we found out he fought in WWII for the Canadian Army and was 88 years old! They like to drive all over and they visit family on their trips. We decided we want to be just like them when we’re 88.

Silly Rocky was not super thrilled to be in the small space.  

Adrian and little baby Pauly seemed just fine in their stall.


After saying our goodbyes to them we hit the road again. This time the RV was squeaking quite loudly for a few minutes causing Ashley a little bit of a panic. “Is it going to explode?” she asked over the walkie talkies we had in each car. “Maybe… but I bet not. It is cold so it should stop once it warms up.” I tried to reassure her. After about 10 minutes of RV squeaking, cats meowing, and Ashley panicking the noise quieted down as the RV motor warmed up.  

After a few uneventful hours on the road we entered into Oregon and then all the way up to Eugene! We exited the highway and navigated some back roads to avoid city driving, and made it to our new place well before nightfall (easily an hour before hehe).  It’s a nice little place with plenty of room for the animals to stretch their legs finally, including our 4 day old lamb, who had spent the majority of her little life in the back of a trailer.

The family enjoying some luscious Oregon grass and stretching their legs! 
Overall, the travel went pretty well for how quickly we had to hit the road and go.  It was a great way for us to do a trial run for the big move to WV later this summer!

-Ric

Monday, May 30, 2016

The first couple days on the road...

Hitting the road on day one involved making the journey all the way to Casa De Fruta… about 100 miles north. I admit it wasn’t a far away goal but it was a way to get some road behind us. I called them to ask if they had a spot open for the night, that was pull through, and that could accommodate a horse trailer with 3 sheep in it… also could we camp there with 3 sheep?

The girl on the phone had to go ask her manager but returned to say it was fine.

Casa De Fruta started as a roadside fruit stand but has become a roadside attraction with an RV park, a model train you can ride on, a restaurant, a carousel, a truck stop, 32 peacocks, and a candy shoppe.
At a previous visit to Casa de Fruta. Just hanging with peacocks.

We arrived after dark and got set up for the evening, clearing off the bed we were using for storage so we had a place to sleep and basically shoveling a path through the RV;  just doing the bare minimum to sleep.

When we awoke we were itching to get on the road again… right after coffee and breakfast. I drove the car down to the coffee shop and get some coffees and pastries, and candy, because why not? We gulped our coffees and downed our pastries (I would be more specific but I honestly don’t remember what they were) and started the RV back up. 

The extremely loud squeaking noise coming from the engine compartment lasted until we exited the park before it began to subside. “What the hell was that noise?” came Ashley’s voice over the Walkie Talkie.

“A loud squeaking noise,” was my super helpful response. 

“Is it broken?” she asked.

“No, just a squeaking belt.” I said, hoping I wasn’t lying. As soon as I said it her voice come over again: “The windshield wipers just came on and won’t turn off!” She was yelling into the headset at this point. “Pull over and I’ll look,” I said.

Once we pulled over I looked under the dash to discover that I didn’t know anything about what under a dash is supposed to look like… I found the wires connecting the windshield wipers via a Google search and disconnected them. “Avoid driving through any rain,” I said, “And you’ll be fine.”


The only excitement for the rest of day two was the constantly escaping cats. Thankfully, Ashley had them in the RV with her so I didn’t have to deal with it. Obi (my cat) was the ringleader of the prison breaks. If I remember correctly they escaped 12 times that day. We eventually moved the cats into one of the hard carriers to better contain them.

Mom...we are literally dying.  I promise.  Let us out.

We made it pretty far that day, deciding to stop just before we got to Oregon in a little town called Weed, CA. We found this little RV park that once again welcomed our little menagerie, and welcomed a nice restful night.

Day 3 soon...

- Ric


Wednesday, May 11, 2016

Part two of Big BIG changes for Fiberton...


A baby lamb is a tiny bundle of cute that is constantly trying to escape or run around like a crazy person leaping off everything in sight as well as trying to climb on Adrian, our ewe.

Pauly was born on Easter some time late at night. We didn't notice until around noon on Monday. We saw a fluffball running around the field when we were coming home from buying moving supplies.

Little Pauly, our Easter baby

“Uuum, what is that?” Asked Ashley. “Is that a baby?”

“No, not everything is a baby.” I said snarkily, mostly because this was the 5th “Is that a baby?” in the past 3 months.

“Then why is it running around?” she continued.

“Balls! That’s a baby!” I exclaimed while jumping out of the slowly moving car.

Normally a successful baby lamb would be just another day on the ranch, but being that we were embarking on a three-day move up to Oregon the next day, it was causing a little stress (understatement).

“Should we call Christy?” Ashley asked, only slightly panicked. Before I could even say “Yes,” she was already on the phone. Christy and Mike were there within an hour, with oats, vitamins, and inoculations in hand.

After they gave us the ok to move her we went back to packing, we were leaving in less than 24 hours after all.

So little and cute! 

Our Friendlord came over to help us finish cleaning and packing for the move so it would look good when she came over to inspect it later (she’s cool like that.)

Pulling out of that driveway was hard, not only because we had a horse trailer being pulled by 26 foot Winnebago, but because we were already missing all the amazing people that we knew there.


JB loaded in the car watching Ash in the Winnebago in front of us

Leaving the driveway of our awesome little farm in San Miguel.
We were super lucky to have such a great place, with such wonderful Friendlords and
friends in the area.  Thank you all for everything!  

Part three with the road trip will come along soon....


Sunday, May 1, 2016

Big BIG changes for Fiberton...Part 1

“Well, I guess we’re moving to West Virginia,” I said to Ashley after receiving the news, “I got accepted to Wheeling Jesuit University’s Respiratory Therapy Program!”

I should introduce myself, I’m Ric! Ashley has probably mentioned me before, but now she’s working like crazy (I’ll explain on what later) so I’m picking up the slack with my superior talents :-)

I am the hubby that Ashley keeps talking about. (On the right.)

As I mentioned above, I got accepted to Uni halfway across the country in a place I’d never heard of, let alone been to. I needed a change of career, or a career at all really. I have asthma and have been in hospitals quite often my entire life (I find them comforting… I know, weird, right?) and I have always wanted to be in a medical field, but didn’t want to be a doctor or a nurse. I honestly had forgotten that respiratory therapists existed until I had a bad day at work and was looking for something better to do with my work life.

I decided to get the full BA degree, so I looked at schools that offered it, there were about 48. And the top five were Ivy League and/or prohibitively expensive. But WJU looked right up my alley, so I applied. Not only did they accept me, but they gave me scholarships!

After we had decided to move there at the end of summer one of Ashley’s old friends called from Oregon and offered her a job on a campaign, it was a city council race that was highly contested and the candidate needed the best campaign manager that Eugene has ever known (I’m tooting her horn for her) and they asked her to come back to the Eug for “One more race.”

“.......... Should we?” Ashley asked me.

“Why the hell not? I love adventure, and excitement.” (That’s why I’d be a bad Jedi.)
After about two days of me convincing her that we could pack up 6 rabbits, 2 sheep, 2 cats, and an incredibly old black lab into Oliver (the cool name we’ve given to our 1986 Winnebago) she caved.

Oliver, our trusty Winnebago

It was official, we had less than a month to pack up and get to Oregon. We discussed it with Ashley’s parents and after they helped us decide it wasn’t a ridiculous idea, we began telling people with “The Friendlords” (our friends who also happened to be our landlords) and then Mike, Christy, and their friendtern (their intern who also happened to be their friend) Tiffany, and lastly our jobs. We began frantically packing and doing dump runs in between our last shifts at work. 

We pulled Oliver around near the house and bought a 2-horse trailer made sometime in the ‘60’s to haul the sheep (Ashley’s dad Dean drove her, like, 4 hours north just to pick it up because it was SUPER CUTE and also half the price of any other ones we saw online). We started overhauling Oliver and converting the pullout bed into a full time bed and putting in the new entertainment center and bookshelf that I had built. (I just learned how to build stuff recently, so I’m bragging.) Once I had hooked up my Playstation, NES, Atari, Genesis, Super Nintendo, Wii, and my computer I was ready to go. (Unfortunately, we still had a whole house to move out of, hehe.)

The adventure will continue...

Thursday, March 17, 2016

Gardening Like a Ninja - Interview with author Angela England


We are so excited to present to all our awesome readers Angela England, homesteader, small biz guru, blogger, green thumb and book writer! She just released her new book, Gardening Like a Ninja, which is basically a must-have for all urban dwellers, landscape enthusiasts, or foodies!


In this book, Angela addresses an issue that I think a LOT of people run into, especially in the city - aesthetics of having a food garden. She shows us in very real way not only how to make your space look beautiful while sneaking in edible plants, but also talks about how to do so in a variety of spaces, big and small. There are wonderful before and after photos, as well as illustrations of how and what to plant in the little side yard or your blasé front lawn. It also features original water color illustrations in Part 2 which are done by the incredible illustrator Wendy Piersall. See her lovely work at http://www.wendypiersall.com.

We were very fortunate to get to ask her some questions about her new book, and here is what we learned!

Ashley from Fiberton: Hi Angela! Thanks so much for chatting with us! We LOVE the new book, Gardening Like a Ninja! I know you talk about it in your forward, but can you tell our readers a little about how this book came to be?

Angela: When I wrote Backyard Farming on an Acre (More or Less) I wanted to show people that they could start producing their own food in even the smallest of garden spaces. One of the sub-sections in one of the gardening chapters talked about edible landscaping and I used the phrase, "Now you're gardening like a ninja!" My publisher loved it and recommended that I pull that topic out as a stand alone book. As more and more readers gave me the feedback "I love the idea of homesteading but my HOA won't let me." or "I'm renting so I can't keep a veggie garden but my landlords will allow general landscaping - tips?" I realized that there is a true need for this book.

Ashley: How long have you been gardening/homesteading? What inspired you to share your knowledge?

Angela: I began a journey towards self-sufficiency when I married my husband. The more we researched what was available for our children the more we realized we really wanted to have a better say over the food we were feeding our kids. Which for us meant producing a great deal of it ourselves! I love when I sit down to a meal of salad, steak, and potatoes and everything on the plate came from our home. As I began talking to other beginners and dreamers I realized that many of them felt if you didn't grow up in that lifestyle, there was nothing you could do. But that simple isn't true! I didn't learn how to grow veggies of my own until I married and pregnant with my first child! And I'm quite the most dis-organized person I know...if I can do it, anyone can do it.

Ashley: Even though I am no longer a city dweller, I still love the idea of making my garden space Secret Garden-esque, which is what I feel like when I read through your book. (I also remember having to deal with making a nice looking yard when I was in the city.) I think your book gives us all the tools to tackle these kinds of projects, but that must have taken quite a bit of time and research. What was the most challenging thing you encountered working on this project? 
 
Angela: It actually took a higher level of research to write this just-under-200 page Edible Landscaping guide than it did to write the 430 page Backyard Farming book. When I was working on this book there were several challenges that I had to keep in mind. 1. Climates and Zones - I live in Oklahoma so the plants I am most familiar with are the plants that grow in my gardening zone. However, I grew up in California so I know there are many plants available to garden ninja that extend far beyond my own zone. I made it a point to include example gardens from a variety of zones and growing conditions so you'll see everything from a tropical porch with lush citrus trees, to a gorgeous New England style home that has a much colder climate to deal with. It was important to me that ANYONE be able to open this book and find a plant relevant to their area.
2. Edible Landscaping Rockstars - Not every edible plant is really a great choice for an edible landscape. So when I make suggestions, say about climbing beans up a trellis to add a vertical accent, I wanted to offer ideas for which beans. Many beans are perfectly edible but plain green pods and plain green vines with plain green leaves. Nothing particular special. However, some varieties have pale white or yellow pods that would shimmer in the sunlight. Others have burgundy tones through the stems, leaves and pods. Others are variegated and spotted and speckled. So that research and talking with nursery owners and plant breeding companies to find specific plant recommendations took a tremendous amount of time and research.
3. Photos - As I said I like in Oklahoma. We don't have a wet enough climate for some of the beautiful coastal garden looks and we don't have a warm enough climate for some of the amazing tropical plants available in zones 8 or 9. So I had to source photos of plants I didn't have or couldn't fine the perfect photo of and that took some time as well.

Ashley: And what was the most interesting thing you learned while doing your research?

Angela: It was really interesting to me how many of the common plants that are now used primarily as landscape plants were originally developed as edibles. Hostas, for example, had been grown for their spring shoots. Now, of course, they are a staple in the shade garden landscape. Recapturing some of that lost knowledge was one of the coolest things to me about writing this book.

Ashley: We hear you are planning on doing a course to accompany the book. Can you tell us more about this?

Angela: Lots of times what I hear from readers is that they want a way to connect beyond the book. That's why I developed this course, to guide people through how to get started. The course will walk people through four units, each with three lessons, and really delve more in depth in some of the areas I didn't have room for in the book. For example how to do a simple soil test at home to determine your soil's composition. Unit four is probably my favorite because I walk people through the EXACT process I used to develop the seven original garden design plans that they find in the book. I develop a bonus plan - a full-sun front border - and as I build the plan I show step-by-step how it's done. They see how to draw the plants, even if you aren't an artist. The simple tools I use that you probably already have in your own (no pricey software required!). And at the end they get an exclusive full-color illustration from Wendy, just like the designs in the book!

Ashley: We know you are always busy working on new projects. Anything else you want to share with our readers?

Angela: Only that Untrained Housewife will be developing a new, free course this summer called Embrace the Journey to help people get over their fears of developing a more intentional and self-sufficient lifestyle. It will be totally free and I will announce it on my newsletter which they can sign up for here: http://untrainedhousewife.com/newsletter

Ashley: Thank you so much for taking time our of your busy schedule to share your book with our readers! We are super excited and can't wait to get our copy!

For all our readers, you can order your own copy of the book and/or the course here on Amazon!

Saturday, February 27, 2016

Time flies when you are....

Having fun?  Homesteading? Knitting, crocheting and spinning?  Playing with silly animals? How about all of the above?

A quick check in.  I promise I will return to my Granny Chic series very soon, but in the meantime, here is a little of what we have been up to at Fiberton!

In the business and crafting side of things:

Ric made me this adorable felty friend!  I wool always love ewe. little felty friend!  We will be releasing these in out etsy shop in the near future, too!


These lovely custom knitting needles are shipped off and on their way to their new home...


 Three more sets of dryer balls dropped into a lovely customer's mailbox this week!


And we are finishing one of these awesome pom pom rugs up for a customer as we speak!


On the animal front:

This guy got an awful haircut.  He would not stop fidgeting!  But he feels sooo much better!  (One person told me it looks like I glued cotton balls on him! hehe)


Rocky and Adrian (and Ric and I) are anxiously awaiting the arrival of a little lamb...


See?  Can't you see the excitement in Rocky's silly little face? (Oh, and mine...)


Then of course the house animals have been keeping us entertained, too....

Silly kitties!  Sister love...


I couldn't help myself but try for another animal selfie.  This time with the old guy.  We took a little drive in the '63 Comet and boy did he enjoy it! 


 And on the volunteer and business front:

I am on the Board of the small Chamber of Commerce in the area, and we put on a Business Expo this week.  I helped with planning and outreach, as well as had a table there.  It was a great success all around!


Whew!  Now that several big projects are off the plate, expect us to get back on the ball with posts!  Hope your February was filled to the brim like a tub full of good stuff! 

Ash

Wednesday, February 10, 2016

Granny Chic a Week Knit and Fabric Heart Potholder

Disclosure: Some of the links in this post are affiliate links, which means that if you go through them to make a purchase I can earn a commission.  But I only link to products that I recommend based on my experience with them, not because of the commission. :)

Hey there fine friends! This is a little late...it is really last week's project.  But better late than never, right?

So to get ready for Valentine's Day, what better than a little hand knit gift, perfect for your bestie or great as a hostess gift!


Cute, right?  It is an awesome fast little project to whip up for you knitters out there.  Then just a little more cutting and some quick hand stitching, and you are set!


Here is what you need to make this project:
  • Scrap yarn in 2 contrasting colors - about 100 yards of main color (MC) and about 20 yards contrasting color (CC)
  • Size 10US Straight Knitting Needles
  • Scissors
  • Wool felt approx 8x8
  • Scrap of fabric approx 8.5x8.5in
  • Matching thread
  • Sewing Needle
  • Crochet hook (optional for hanger)


How to make the cute lil' potholder:

Knitted side:

Abbreviations:

Kn: Knit
P: Purl
MC: Main Color
CC: Contrast Color
RS: Right Side
WS: Wrong Side

NOTES: You will be working in seed stitch throughout, except for the contrast color, which is done in stockinette.  When you get to the heart color work, pay attention to the change in the pattern.  And you can leave the yarn behind on the wrong side while changing colors, but make sure not to pull too tight, which will cinch up your fabric and it will not lay flat.

Here we go....

In MC, cast on 40 stitches in your preferred method.  

Rows 1-6 :Seed stitch pattern - *kn1p1 - repeat from * across each row.  

Row 7 (RS): Switch to CC and knit across.

Row 8: Continue in CC, Purl.  Cut yarn and secure ends.

Row 9 (RS): In MC, knit.

Rows 10 -11: Seed stitch - *kn1p1 - repeat from * across each row.

Row 12 (WS): Kn1,p1 (seed stitch) 10 times (20 stitches). Keeping MC at back (WS), switch to CC, p1. Keep tail at WS, return to MC, P1. Continue kn1p1 to end.

Row 13 (RS): Kn1,p1 (seed stitch) 9 times (18 stitches).  Keeping MC at back (WS), switch to CC, kn3. Keep tail at WS, return to MC, p1.  Return to kn1p1 to end.

Row 14 (WS): Kn1,p1 (seed stitch) 9 times (18 stitches). Keeping MC at back (WS), switch to CC, p5. Keep tail at WS, return to MC, P1. Continue kn1p1 to end.

Row 15 (RS): Kn1,p1 (seed stitch) 8 times (16 stitches). Keeping MC at back (WS), switch to CC, kn7. Keep tail at WS, return to MC, P1. Continue kn1p1 to end.

Row 16 (WS): Kn1,p1 (seed stitch) 8 times (16 stitches). Keeping MC at back (WS), switch to CC, p9. Keep tail at WS, return to MC, P1. Continue kn1p1 to end.

Row 17 (RS): Kn1,p1 (seed stitch) 7 times (14 stitches). Keeping MC at back (WS), switch to CC, kn11. Keep tail at WS, return to MC, P1. Continue kn1p1 to end.

Row 18 (WS): Kn1,p1 (seed stitch) 7 times (14 stitches). Keeping MC at back (WS), switch to CC, p13. Keep tail at WS, return to MC, P1. Continue kn1p1 to end.

Row 19 (RS): Kn1,p1 (seed stitch) 6 times (12 stitches). Keeping MC at back (WS), switch to CC, kn15. Keep tail at WS, return to MC, P1. Continue kn1p1 to end.

Row 20 (WS - NOTE: No increases in CC): Kn1,p1 (seed stitch) 6 times (12 stitches). Kn1. Keeping MC at back (WS), switch to CC, p13. Keep tail at WS, return to MC. Continue kn1p1 to end.

Row 21 (RS): Kn1,p1 (seed stitch) 6 times (12 stitches). Keeping MC at back (WS), switch to CC, kn15. Keep tail at WS, return to MC, P1. Continue kn1p1 to end.

Row 22 (WS): Kn1,p1 (seed stitch) 6 times (12 stitches). Kn1. Keeping MC at back (WS), switch to CC, p15. Keep tail at WS, return to MC. Continue kn1p1 to end.

Row 23 (RS): Kn1,p1 (seed stitch) 6 times (12 stitches). Keeping MC at back (WS), switch to CC, kn15. Keep tail at WS, return to MC, P1. Continue kn1p1 to end.

Row 24 (WS): Kn1,p1 (seed stitch) 6 times (12 stitches). Kn1. Keeping MC at back (WS), switch to CC, p15. Keep tail at WS, return to MC. Continue kn1p1 to end.

Row 25 (RS - NOTE - Decreasing of CC begins): Kn1,p1 (seed stitch) 6 times (12 stitches). Kn1. Keeping MC at back (WS), switch to CC, kn6. Keep tail at WS, return to MC and p1. With CC, kn6. With MC, continue kn1p1 to end.

Row 26 (WS): Kn1,p1 (seed stitch) 7 times (14 stitches). Keeping MC at back (WS), switch to CC, p5. Keep tail at WS, return to MC and p1,kn1p1. With CC, p5. With MC, P1. Continue kn1p1 to end.

Row 27 (RS): Kn1,p1 (seed stitch) 7 times (14 stitches).  Keeping MC at back (WS), switch to CC, kn3. Keep tail at WS, return to MC and p1,kn1,p1,kn1,p1(total of 5 stitches in MC). Then, with CC, kn3. Back to MC, P1. Continue kn1p1 to end.

Row 28 (WS): Kn1,p1 (seed stitch) 8 times (16 stitches). Keeping MC at back (WS), switch to CC, p1. Keep tail at WS, return to MC and p1.  Kn1p1 pattern 3times (total of 7 stitches in MC). With CC, p1. With MC, P1. Continue kn1p1 to end. Clip CC and secure ends.

Rows 29-32: Kn1,p1 across.

Row 33: With CC, kn across.

Row 34: With CC, purl across.

Rows 36-39: Kn1,p1 across.

Row 40: In kn1,p1 pattern, bind off.


Now you are done knitting!  Whew! Now to finish....

Take your finished square and lay it on your felt.  Cut out felt to match size of knitted fabric.


Now take your fabric, and cut about half an inch larger than the wool and knitted fabric size.

Take your handy iron, and press under about 1/2in of the fabric on each side.

Sandwich your felt in between your knitted fabric and regular fabric (making sure right sides are facing out.)  Hand stitch the sandwich closed with a whip or invisible stitch.


And you are done! If you would like a little hanger for the corner, grab your main color and a crochet hook and chain 10, and then secure onto a corner.

We hope you enjoy it!  We will try and get a grid of the pattern out asap, too!


If you make this cutie, make sure to use #fibertonacres on social media so we can check it out!  We would love to see your creations!  And if this is all too much, you can just buy one at our Etsy shop here!

Thanks again!

Ash

PS - If you want a PDF version to download, head here and click on the tutorial!