Showing posts with label stash buster. Show all posts

Saturday, January 16, 2016

DIY Pom Pom Flower Bouquet - Granny Chic a Week

Disclosure: Some of the links in this post are affiliate links, which means that if you go through them to make a purchase I can earn a commission.  But I only link to products that I recommend based on my experience with them, not because of the commission. :)

Hey there!  Ok, ok...I am totally cutting it close for this week's Granny Chic a Week project.  But this one is a quick and easy one that will add a pop of color and never die!


This has been on my to-do list for YEARS! And now that it is done, I am loving it!

Here is what you need:


Pom poms.  These are ones that I made using the technique I talked about last week.  Check that out here.  This is an AWESOME way to use up those small balls of yarn from other projects!


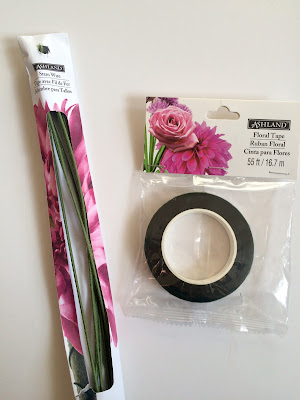
You will also need some floral stem wire and floral tape.  You can find them at the links provided or at pretty much any craft supply store.

How to make your bouquet:

Once you have the pom poms made, this is super easy!

First, take some floral wire and carefully push it up through your pom pom.  Do this slow and support the pom pom so all your yarn doesn't come apart.

The cat has to sneak into every one of these tutorials....
Next, make an upside down 'V' with the wire.  We will carefully snake this back through the pom pom.


Carefully press the wire back through the pom pom, like below.  Pull slowly until it is just hidden in the fluff of the pom pom.  If you pull too hard, the strings will just pull out and ruin the pom pom.


Now you should have something that looks like this.  


Carefully peel off some floral tape and we will start wrapping...


Kind of pull up the yarn at the bottom to finish wrapping the wire.


Now you should have one completely flower!


Easy, right?  Now just repeat until you have your desired number of flowers for your bouquet, grab a cute vase, and display!  


Check back again next week for our next granny chic project! 

Ash

PS - If there is something you have seen but can't find a tutorial on, maybe I can help!  Let me know what granny chic project we should work on.  Or just share your project!


Tuesday, September 1, 2015

Sweet and Simple Crochet Clutch Pattern

Disclosure: Some of the links in this post are affiliate links, which means that if you go through them to make a purchase I can earn a commission.  But I only link to products that I recommend based on my experience with them, not because of the commission. :)

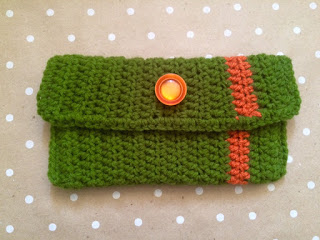
We are so excited to share our first DIY pattern!  This one is a little clutch we have been working on here at Fiberton Acres.


We have been selling these at our local markets and shows, and they are a lot of fun to make.  Great for beginners, but also such a great stash buster for any level.  Plus, I LOVE buttons!  So I have a blast finding adorable buttons to go with each one of these little beauts!

I have the whole pattern below, but if you'd like to print it off, click here.


Fiberton's Sweet and Simple Crocheted Clutch


Tools/Materials:

  • Size G Crochet Hook
  • 1 Skein (~150 yards) worsted weight yarn (on the thicker worsted weight side) in main color
  • Small ball (~10-15 yards) in contrasting color
  • Alternative for yarn: Use up your stash or small balls for striping! Or a fun multipack of yarn like this...!
  • Thread and needle to secure button.
Abbreviations:

Ch: Chain
Sl: Slip Stitch
Sc: Single Crochet
Hdc: Half Double Crochet


The Pattern:


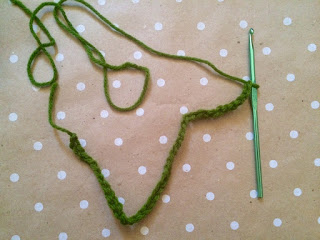
Chain 40 in main color.


Row 1:


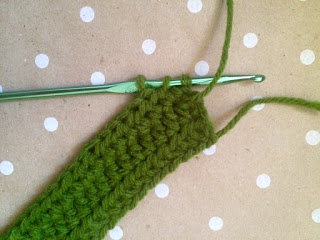
Turn, and skipping the first 2 ch, half double crochet (hdc) into 3rd chain from hook. The first 2 ch will become your first hdc. Continue in hdc to end of row - 38 hdc total.


Row 2:


Ch 2 and turn. Hdc into each stitch to end.


Row 3:


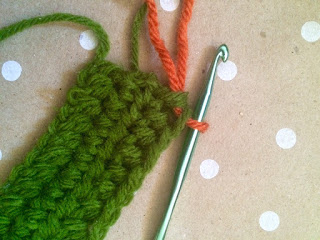
Ch 2 and turn. Hdc into each stitch to end, but at last stitch, don't pull the final loop through, leaving the 3 loops on your hook, like this:


Then grab your next color and pull that through to complete that hdc. This is the best way to switch colors smoothly.


Row 4:


Ch 2, turn and hdc to end.


Row 5:


Same as row 3, you will ch 2, turn, hdc to end but don't complete the last stitch to change back to main color (see row 3).


Clip off contrasting color to get it out of the way while you finish. Pick the main color back up and complete last stitch with it as you did above.


Rows 6-10:


Ch 2, turn, hdc to end.


Row 11 (buttonhole row):


Ch 2, turn, hdc 32 times, ch 1, skip next stitch, hdc remaining stitches. (This will fit up to a 1 in button. If you want a larger or chunkier button, hdc to 31 stitches, ch 2, and then skip next 2 stitches and hdc to end.)


Row 12:


Ch 2, turn, hdc to end, including 1 (2) around chain. 38 stitches total still.


Rows 13-21:


Ch 2, turn, hdc to end.


Finishing:


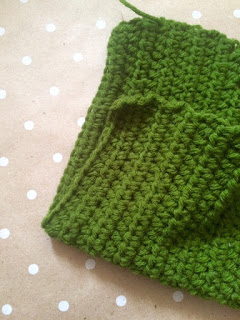
First, fold the bottom of your clutch most of the way up, like this… (You will want to check to see where you like the buttonhole to sit on your top flap.)


Next, starting at the bottom right of the clutch, sl through all thicknesses of your piece. (Right by the fold, as we are about to secure the pouch in place.)


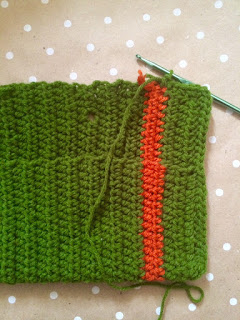
Then sc up the right side through all thicknesses and continue on to flap edging. This will give your clutch a more finished look. At the corner, chain 1 and sc back into the same stitch you just sc'd into. This will create a clean turn. Continue across top. (You will be crocheting into what is called the ‘post’ now, which is wider than a normal stitch, so you may find you need to make 2 stitches into each post to create a clean look. Let me know if you have questions on this.)


At the next corner, do as you did on the last corner with 1 ch and sc back into same stitch as the last sc, then continue down the left side to secure the last side of the pouch. Cut yarn and slip through loop on hook to secure.


At this point, turn inside out and pull all yarn ends through to wrong side and weave in. (I often then secure them further with FrayCheck. Also found at most craft supply store.)


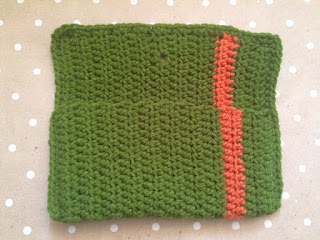
Now your clutch should look something like this! Time to pick out your button! The hole will stretch a fair amount if you want a chunkier button, but I'd say no more than 1 in. If you did a bigger hole, you can do a much larger button.


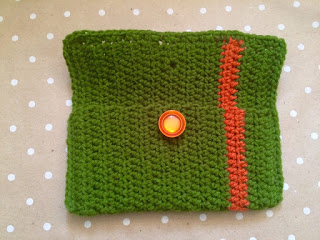
Mark where your button will sit, and stitch on with thread and needle and secure well.


And ta da!!

Your very own handmade clutch! These are so fun and fast that you will want to make them for:
  • gifts (your friends will think you're the coolest)
  • every outfit you own
  • anytime you see an adorable button
  • to use up those scraps
  • or when you want some quick gratification!


Thanks for joining in the fun! We’d love to see your creation! Share your clutch (or ask us questions) on our Facebook, Instagram or Ravelry! Or, if you think this is cute and fun and all, but don't want to pick up your hook, head on over to our etsy shop and pick one out for yourself. :)


Ash


PS - We are working on growing our patterns and DIY section on our website, and we have a few already on there you can check out for both knitting and crochet.