
Disclosure: Some of the links in this post are affiliate links, which means that if you go through them to make a purchase I can earn a commission. But I only link to products that I recommend based on my experience with them, not because of the commission. :)
It is rounding the bend quickly (too quickly!) to the holidays, and I have been in full maker mode! I recently made a crochet stocking that was inspired by vintage everything - colors, style, feel - basically anything that invoked a feeling of nostalgia for my Etsy shop. (As you may remember from a previous post.) And I thought, "Hey Ashley, you should share this pattern with the world!"

Fiberton Acres' Cottage Chic Stocking Pattern
Tools/Materials:
Size I Crochet Hook
1 Skein (~200 yards) worsted weight yarn (on the thicker worsted weight side) in color of your choice
Alternative for yarn: Use up your stash or small balls for striping or if you have thinner yarn, use two strands of yarn or a fun multipack of yarn like this...
The Pattern:


You should get back to your original 43 stitches. (Hey - don't panic if the numbers are not quite right! Just rip back a little and add a stitch or sc2tog to subtract a stitch to make up for it. But 43 is the magic number to get back to.)

So this is just that! Here is the tutorial here, but down at the bottom you can find the downloadable and printable pdf for your crocheting ease.
Fiberton Acres' Cottage Chic Stocking Pattern
Tools/Materials:
Size I Crochet Hook
1 Skein (~200 yards) worsted weight yarn (on the thicker worsted weight side) in color of your choice
Alternative for yarn: Use up your stash or small balls for striping or if you have thinner yarn, use two strands of yarn or a fun multipack of yarn like this...
Abbreviations:
Ch: Chain
Sl: Slip Stitch
Sc: Single Crochet
Ch: Chain
Sl: Slip Stitch
Sc: Single Crochet
Hdc: Half double crochet
Dc: Double Crochet
Dc: Double Crochet
Dc2tog: Double crochet 2 together for decrease
Cbl: Cable Stitch
The Pattern:
Note: This pattern is crocheted in the round until we reach the heel, then after the heel, you will resume crocheting in the round.
Step 1: Chain 3 and then slip stitch into first ch to create a loop.

Round 1: Ch 2 (this will act as first dc), dc 14 into loop, resulting in 15 dc. Sl st to join.

Round 2: Ch 2, dc into same stitch, then 2 dc into each around, sl st to join. 30 dc total.
Round 3: Ch 2, dc into same stitch, dc next stitch, *2 dc next stitch, 1dc into next 2 stitches*, continue from * to last stitch, sl st to join. 41 stitches
Round 4: Ch 2, dc into same, dc to end, sl st to join. 42 stitches
Round 5: Same as Round 4. 43 stitches
 |
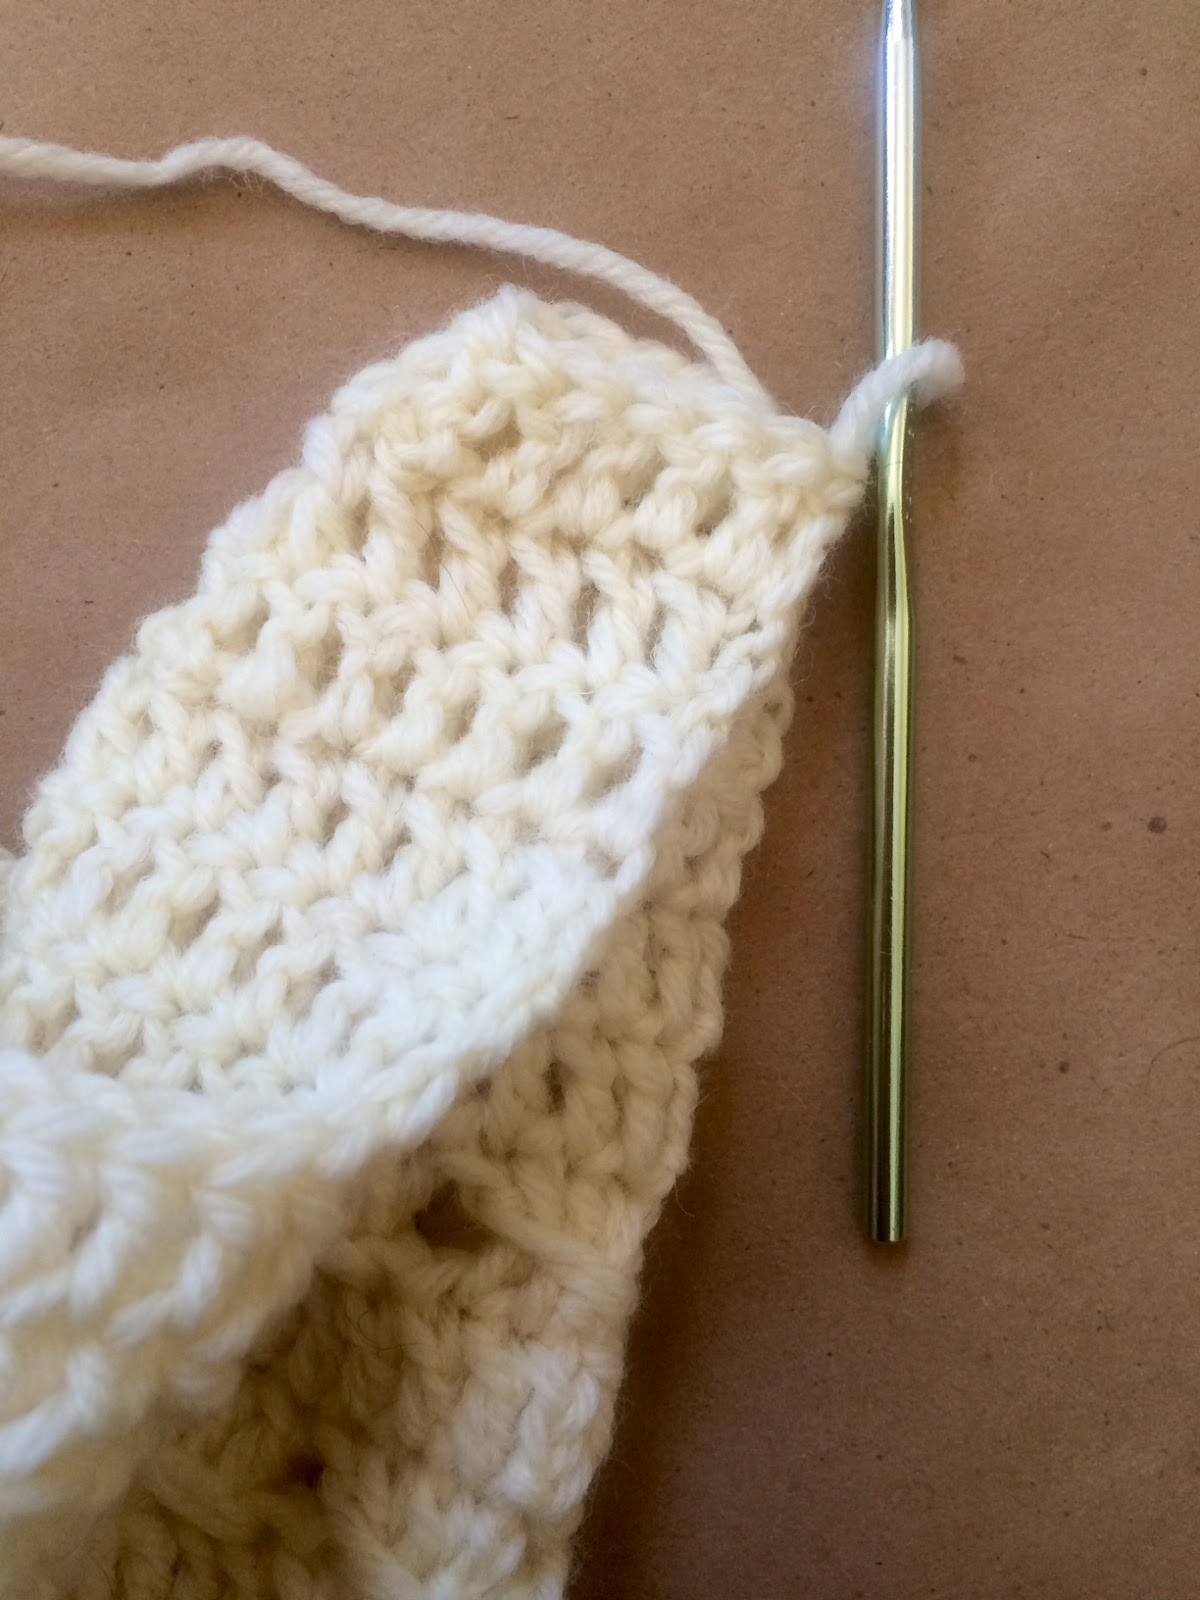
At this point will have a little 'hat'. This is the toe of the stocking.

Round 6: Begin the crochet cable stitch. Ch 2, 1 dc in next 2 so you have a total of 3 stitches like this:

Then wrap yarn as to dc, but reach back across all 3 stitches and insert hook into the last dc of the prior row and dc as normal.

Basically this will create a cable look back across the last 3 stitches. To continue, skip the next stitch, and dc in the next 3 stitches, as seen below.

Once again, wrap your yarn as if to dc, reach back to skipped stitch and finish dc.

Continue in this fashion to end of row, sl st to join.
Round 7: Dc across and sl st to join.
Rounds 8-10: Repeat rows 6 and 7.
Heel: The heel is worked back and forth.
Heel Row 1: Ch 2, Dc 19 stitches - 20 stitches total
Heel Row 2: Ch 2, dc 7 stitches, dc2tog twice, dc 8 - 18 stitches total
Heel Row 3: Ch2, dc 6, dc2tog twice, dc 7 - 16 stitches total
Heel Row 4: Ch 2, dc 5, dc2tog twice, dc 6 - 14 stitches total
Heel Row 5: Ch 2, dc 4, dc2tog twice, dc 5 - 12 stitches total

Your heel will look like this (above.)
Closing the heel:
Turn wrong side out and fold in half as pictured below.
Then slip stitch closed and cut yarn. I like to use a little Fray Check to make sure end won't come undone.

You should end up with a heel that looks like this:

Picking up stitches to continue in the round - a.k.a - Round 11:
Now we will pick up stitches around the heel and foot to make the ankle part of the stocking. Starting at the seem of the heel, pick up and sc 8 stitches to corner.

At the corner, skip a stitch and continue to sc across. Do the same when you reach the next corner, skipping a stitch, and then pick up and sc 8 and sl st to join.

You should get back to your original 43 stitches. (Hey - don't panic if the numbers are not quite right! Just rip back a little and add a stitch or sc2tog to subtract a stitch to make up for it. But 43 is the magic number to get back to.)
Now we will resume the pattern! Yay!
Rounds 12-25: Repeat rows 6 and 7


Finishing: Cut yarn and weave in ends and now only one thing left to do! Make your loop to hang the bad boy from!

For the loop: Chain 20, turn and skip 2 ch, hdc across. Cut yarn and then sew in your desired location for the stocking to hang how you'd like.

Round 26: Ch 2, dc around
Round 27: Ch 2, turn, dc around and sl st to join. (Here you will be dc-ing around in the opposite direction, which will create a nice fold for the cuff.)
Round 28 - Scalloped Edging: Ch 2, dc 6into same stitch, skip 3, *7dc into next stitch, skip 3*, repeat from * around to end, sl st to join.

Finishing: Cut yarn and weave in ends and now only one thing left to do! Make your loop to hang the bad boy from!

And tada! A lovely cottage chic, vintage inspired stocking of your own! Make the whole family one, or use it as a very special way to wrap your packages.
Or, if this all sounds like a little more than you want to bite off, you can buy one at our Etsy shop here!
We hope you love this pattern as much as we loved making it! And make sure to share your finished creations on Ravelry, or your favorite social media (use hashtag #fibertonstocking)
Ash
I love this. As soon as I finish my mini-stockings, I think I will try this one. Thanks for sharing your pattern and tutorial.
ReplyDeleteThanks, Missy!! We would love to hear how it goes and see a pic! And your mini-stockings sound super cute!
DeleteAshley, I know it's been a while since you wrote and posted this pattern, but I wanted to let you know it's still being seen, loved, and made! I am using your pattern for my son and his new wife for their stockings for their first Christmas together this year <3 (2016). Thank you for sharing your gift with us :)
ReplyDeleteShawne! That is the sweetest comment ever! I am so glad you are loving this pattern still! If you are on other social media, like FB (post a pic to our page) or Instagram (tag us @fibertonacres), we would love to see! Happy holidays and thanks again!
DeleteThis comment has been removed by the author.
ReplyDelete